This is what you can expect as you take on MDriven's Bootcamp.
ENGAGEMENT
If you want to understand MDriven or achieve meaningful results, learning how to use it is important. Creating information systems for real-world applications can be complicated, but life itself is complex. We strive to simplify the mastery of MDriven for everyone interested in exploring its capabilities, ensuring you can revisit and enhance your knowledge as needed. Each step is accompanied by a video tutorial, screenshots, GIFs and instructions in text - making the learning process as natural as if we were right there with you.
PARTICIPATION
Learn how to handle the tool, including adding classes and creating associations. We have noticed that it can be challenging for people to use the tool for the first time, so we dedicate extra effort to these initial steps to ensure you understand the concepts fully. For instance, we emphasize separating the model as a repository with all the classes instead of using diagrams that only display part of the model.
COMPLETION
How long will it take you to complete Bootcamp? Well, that depends on where you fit into these three paths:
- Beginner: You may need up to 3 months or more to learn MDriven.
- Intermediate: It may take you 2 months to grasp all the concepts.
- Advanced: You may learn everything in 1 month.
- Each path is a piece of the journey. Ensure you understand each concept in order to benefit from the knowledge in your own model.
- MDriven ModelCraft is an additional learning course that helps you to:
- Learn to think like a modeler
- Master modeling
ESSENTIALS
Before you begin, make sure you have the following essentials in place:
- A computer with a Windows operating system
- A modern web browser for development (Google Chrome, Mozilla Firefox, or Microsoft Edge)
DUAL LEARNING:
Videos
Starting from Chapter 1, a video tutorial serves as a guide for you to learn how to use MDriven Designer. Each video covers a number of steps showcasing a different area of the Designer. The videos become increasingly more complex as you gain more experience and understanding.
Wiki: Text Instructions
The instructions are laid out in a text format in the Wiki. You can follow along via text to ensure you don’t miss anything. Screenshots and GIFs are also included.
ADDITIONAL LEARNING RESOURCES
- The MDriven Book: Read the book to internalize the philosophy upon which MDriven’s approach to model-driven development is built.
- UML School: Provides insight into UML (Unified Modeling Language).
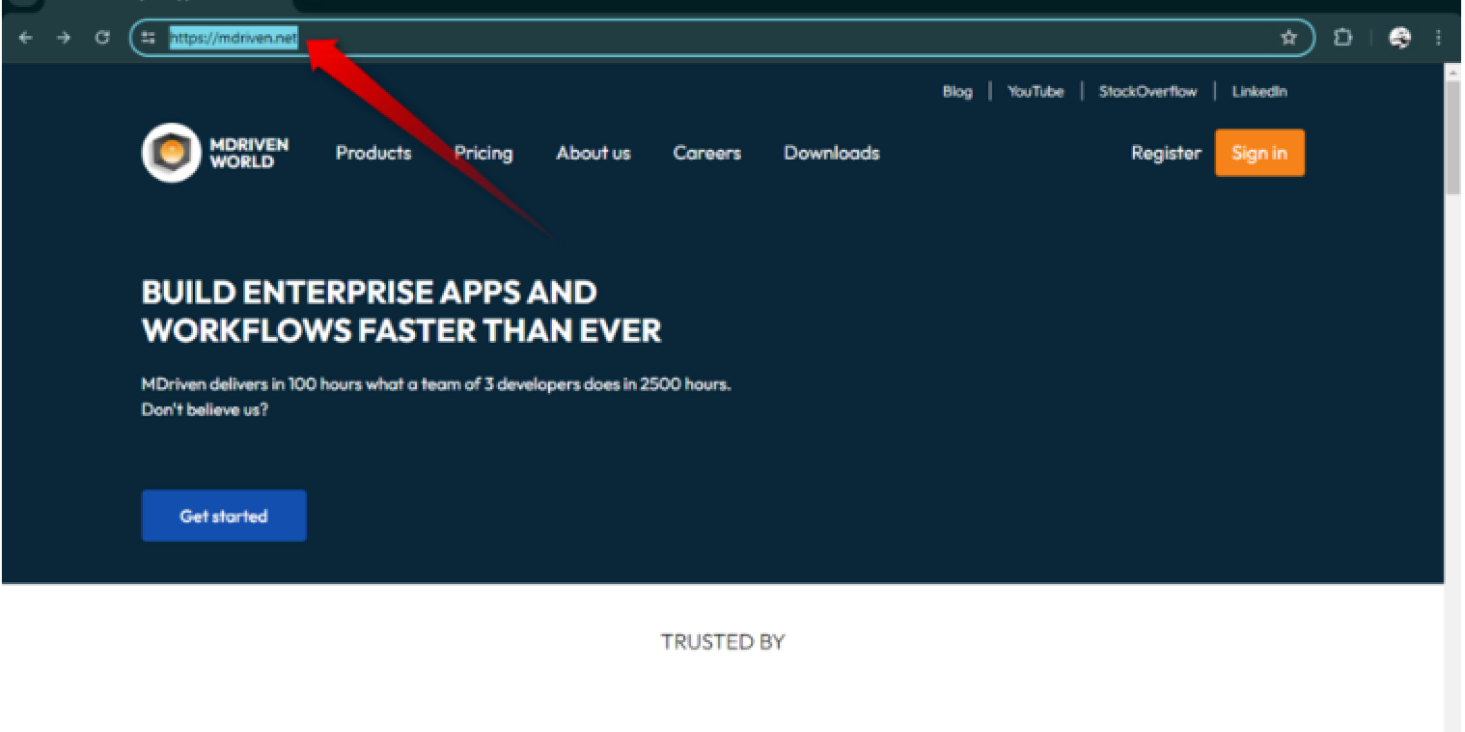
Type mdriven.net into your browser.
To use MDriven Designer, you have two options (see:
MDriven Shorts | How to install MDriven Designer?
):
Option 1: (Blue)
Start MDrivenDesigner by clicking the "Run with ClickOnce" link at:
https://mdriven.net/designer.
You can choose to always run the MDriven Designer online using "Run with ClickOnce".
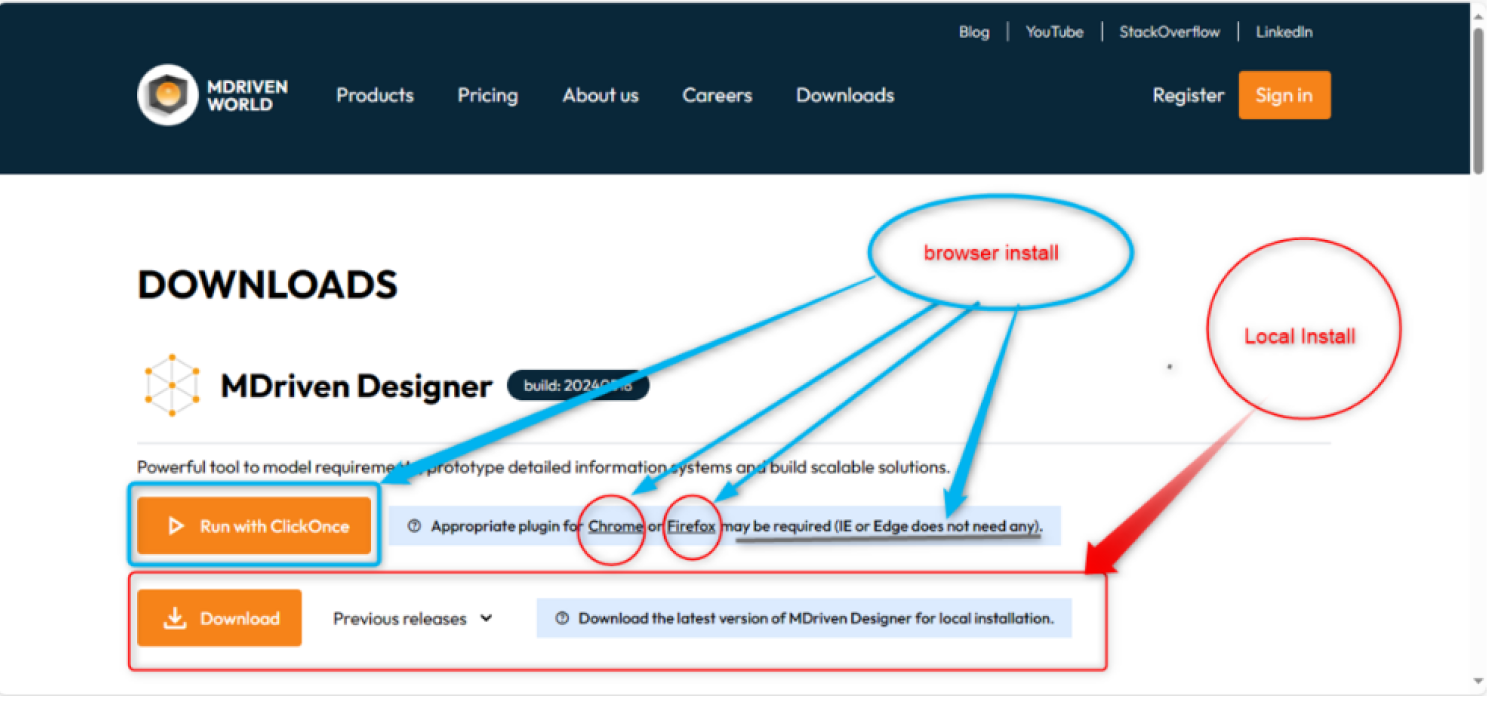 Option 2: (Red)
You can decide to download and install the MDriven Designer, running it locally and making it available offline.
Download using either Google Chrome or Microsoft Edge (Internet Explorer is not a viable option).
Downloading may take some time if there is a new version.
If you're using Chrome, install the Cegid Peoplenet ClickOnce launcher extension from the Chrome Web Store (Microsoft Edge does not need a plug-in).
SUPPORT
Ask questions or seek help when you need it.
Wiki
The MDriven Wiki contains answers to most of the questions and issues you may face. Use the Search bar or check out the Search Center.
StackOverflow
Get insight from our channel on StackOverflow. Check out the responses to the queries of other users.
PAID SUPPORT
Register your query or report a bug using the Support registration form or send an email directly to the MDriven Team here:
support@mdriven.net
Prepare for the first Bootcamp chapter[edit | edit source]
Prepare for the first Bootcamp chapter[edit | edit source]
Start with Chapter 1. Its first step directs learners to follow the installation instructions in the Before Starting Guide.
Chapter 1 begins with MDriven Designer and a local model file:
- Create a new empty model.
- Save the model on your device. The chapter example uses
c:\temp\MDrivenEducation\Start.modlr, or an equivalent location.
- Create the
Person class.
- Add a
Name attribute of type string.
- Save regularly with
CTRL + S.
- Select the Play button, choose XML persistence, select
Start system, and then select Show debugger.
- Continue the chapter steps to create two
Person objects and save them from the debugger.
The Chapter 1 exercise uses XML persistence. It also instructs learners to locate the saved XML file in the same location as the model file.
Local web application exercise[edit | edit source]
Chapter 3 introduces starting a local web application from MDriven Designer. The documented sequence is:
- Select the Play button and choose
LocalTurnkeyPrototyper.
- Select
Check MDriven Turnkeycore to download the latest MDriven Turnkey version for .NET Core.
- Select
Start local MDriven Turnkeycore.
- Open the local address in a web browser.
The documented default port is 8182, so the example address is http://localhost:8182. Use the port shown by the local process if it differs.
The Bootcamp is organized as step-by-step exercises. Chapter 1 states that its steps are intended to be followed progressively and revisited when needed. The Bootcamp overview also describes short instructions with screenshots, GIFs, and video tutorials.
If the terminal appears broken when starting local MDriven Turnkeycore, Chapter 3 says this can be caused by a file lock from the installation. Restart MDriven Designer and repeat the start step.
Use this Bootcamp for a practical, hands-on introduction to building software systems with MDriven Designer. The course focuses on visual models rather than writing code alone.
The Bootcamp introduction says that the course includes:
- Modeling and managing CRUD operations.
- Debugging systems.
- Generating diagrams and user interfaces.
- Working with OCL, Action Language, and OCL-PS.
- Building and deploying web applications.
- Designing responsive user interfaces with placing containers and layout principles.
- Applying inheritance and state machines to model behavior.
- Setting up authentication and user management.
- Understanding and configuring MDriven Server for online deployment.
Follow the installation instructions in the Before Starting Guide, then begin with Chapter 1. Chapter 1 starts with an empty model and guides you through:
- Creating and saving a model.
- Creating a
Person class and a string Name attribute.
- Running the model with XML persistence.
- Using the Debugger and the
person.allinstances expression to inspect objects.
- Creating and saving
Person objects and confirming that their XML data persists beside the model file.
- Creating a
Car class, associating it with Person, and adding a RegistrationNumber attribute.
Save the model often with Ctrl+S.
Later exercises include responsive interface layout. For example, Chapter 8 uses placing containers to organize ViewModel content. Its exercises cover row and column direction, grow settings, wrapping, alignment, margins, and save-button visibility and enabled-state behavior.
The Bootcamp advises working through the steps gradually. If you lose your way, return to a step related to the concept you are working on and continue from there.