Generate Reports Using OpenDocument and Microsoft Office
OpenDocument format is an open file format standard for office applications compatible with Microsoft office and open source applications like LibreOffice and OpenOffice.
Common filename extensions used of OpenDocument documents are:
.odtfor text documents.odsfor spreadsheet documents
Mdriven applications allow generating reports from model-driven data using OpenDocument format.
Text Document
Start by creating an OpenDocument text document using any office application that supports OpenDocument format.
Add %meta% tag within the document as this will be used to print out all the available tags within our ViewModel for printing out Model data.
Note: Make sure to write tags without spaces between the word(meta) and the percentage(%) signs.
Saving Strategies
Temporary Location
create a folder named temp in your C:/ directory and save your file in the directory as mytemplate.odt.
Your url path will now be 'c:\\temp\\mytemplate.odt'
Permanent Location (AssetsTK Strategy)
This strategy allows your template document to be uploaded with your model onto the server running your Turnkey application during deployment.
Go to the location where your .modlr file is saved
Create a folder with the name in the format of <YouModelFileName>_AssetsTK where <YouModelFileName> is the name of your .modlr file name.
Within the folder create another folder named content where your save your template document.
Your url path will now be 'http://localhost:8182/content/mytemplate.odt'
Check here on how to have a dynamic url for when your deploy your application onto the Mdriven Server.
Create a ViewModel with the Name OpenDocumentReportTemplate
Within the ViewModel context menu, click Add column > Add columns needed for Report or create columns TemplateUrl and ReportFileName within the viewmodel.
Select the view model to view the settings on the right.
Uncheck Use placing hints section at the top.
In the TemplateUrl column expression, enter the url path created earlier using any of the saving strategies above.
in the ReportFileName column expression enter a file name for the new OpenDocument that will be generated in the format '<FileName>.odt' where <FileName> is the name of your file.
create a class action within the
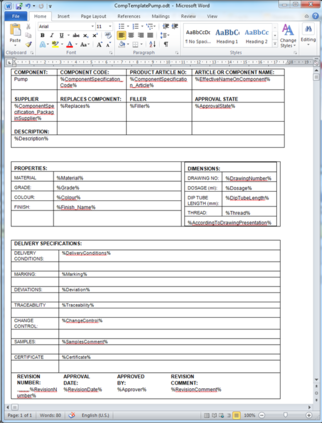
Create a Word template:
You can have grids in grids to create structure:
Save this as an open document file (odt). Save it to a place where you can access it from a URL (maybe you use SharePoint, or just stick it on some website).
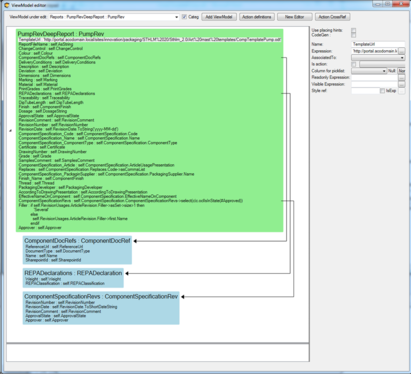
Now you need data. Declare a ViewModel in Modlr:
(By now, you know that a ViewModel transforms your model for a specific need – in this case, the OpenDocument Report.)
Create two extra ViewModelColumns in your ViewModel - TemplateUrl and ReportFileName:
Make the TemplateUrl column return the URL to where your template from above can be found – maybe in some SharePoint instances, as in this example.
Make the ReportFileName column return what the file should be called when produced.
And you are done.
Execute the report by using the new EAL operator:
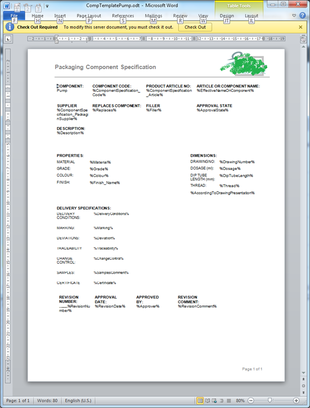
vSomePumpRev.opendocumentreportshow(‘PumpRevDeepReport’) – this will call the OnOpenDocument event on the new IOpenDocumentService. This happens when each UI platform has its own way of showing things to a user.
namespace Eco.Services
 {
  // Summary:
  //     OpenDocumentService , ViewModel needs root level column describing url to
  //     template. Column must be namned "TemplateUrl" and be a valid url to a open
  //     document template
  public interface IOpenDocumentService
  {
    event EventHandler<OpenDocumentArgs> OnOpenDocument;
    byte[] AsByteArray(IObject vmroot, string viewModelName, out string reportname);
    void ExecuteOnOpenDocument(IObject vmroot, string viewModelName, byte[] openDocumentData, string reportname);
  }
 }
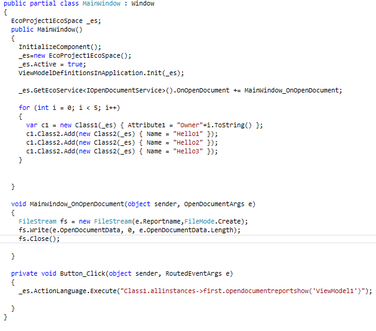
In WECPOF for WPF, we do this:
      File.WriteAllBytes(suggestedfilename, openDocumentData);
        System.Diagnostics.ProcessStartInfo sInfo = new System.Diagnostics.ProcessStartInfo(suggestedfilename);
        System.Diagnostics.Process.Start(sInfo);
In ASP.NET, you would do something else.
If you do not want to open the file – generate the data within – then use the new EAL operator vSomePumpRev.opendocumentreportasblob(‘PumpRevDeepReport’)
A Brief Recap (A Bit Hasty and Vague)
So you might think I just skimmed over stuff – like: how do you get a hold of the placeholder tags that are replaced with data?
Do this by entering the tag %meta% in your template. We will always look for this tag – and when found, we will add all valid tags in their places.
How do you create a hierarchical structure in the report? Find it like this in the data:
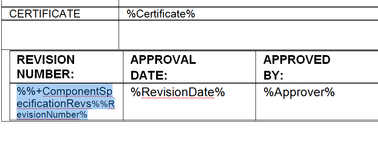
And like this in the template:
The tag %%+Name% acts as a row builder. The following tag %OtherName% is the data in the child. In the Example: %%+ComponentSpecificationRevs% – I stick this as the first thing in a table row and the row will be duplicated for each child. Then the %RevisionNumber% is filled in in the cell.
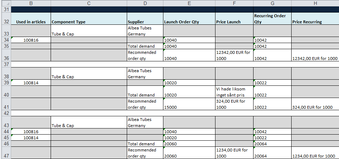
The reporting mechanism also works for Excel. An example of an Excel result report:
Update 2014-03-06. Qualifications
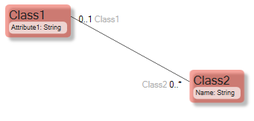
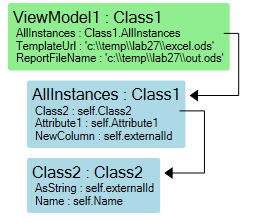
When working with reports, we sometimes do not know in design time what needs the report will have at runtime. To handle this situation, the template tagging has been extended to allow for qualifications. Let me explain. The smallest possible report sample:
We want to allow for picking the correct Class2 in runtime time while working on the template.
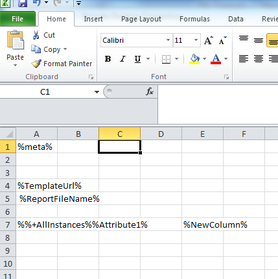
If we have this Excel template:
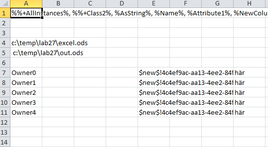
We get this data out:
The qualification extension is that we can now have Template tags like this:
%Class2[Name=Hello1]Name%
What this means is that we are navigating to ViewModel column Class2 – but this is a list – and filter the result on the ViewModel column Name of ViewModelClass Class2. Taking the one with value “Hello1” – for that Class2 we use the Name column… Example:
will give you:
(Notice that we have different external ids in the two last columns – the first from a Class2 with Name==Hello1, the other from one with Name==Hello2)
This is useful when you have data in name-value pair patterns.
Update 2014-04-04 -- Images in Word reports
This is how you can do it.
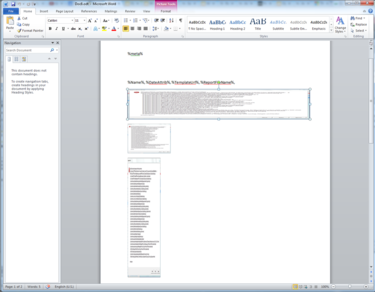
Add some placeholder images in the template:
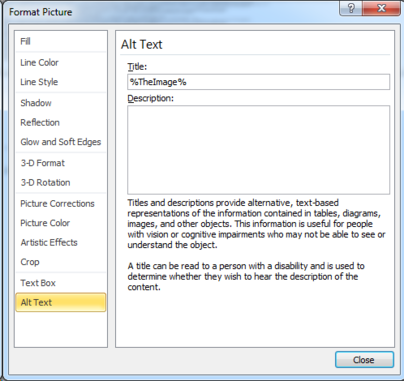
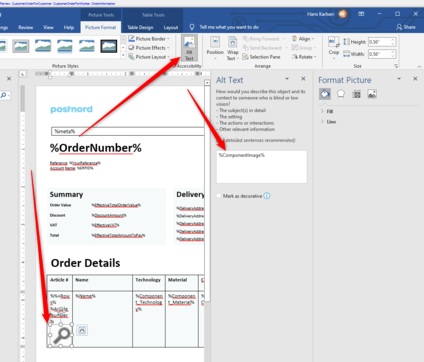
On the Image “Format Picture” – Alt Text property – enter the Tag that holds the image blob in your ViewModel:
Later, in Office(Word), it will look like this:
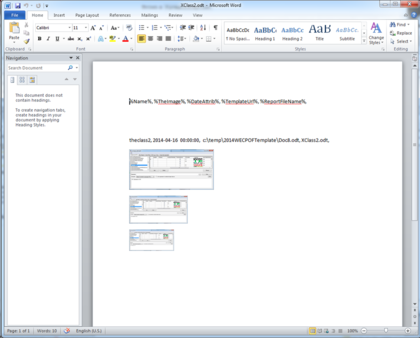
Now, the image will be replaced with your data. Also, new today is the fact that the Aspect ratio of your data is kept in the final Word (odt) report:
The MDriven Book - See: Prototyping

