No edit summary |
(Automatically adding template at the end of the page.) |
||
| (3 intermediate revisions by 2 users not shown) | |||
| Line 1: | Line 1: | ||
__NOTOC__ | __NOTOC__ | ||
This article describes a new feature of the EcoSpaceDebugger. The feature lets you easily import any tab separated data into any eco-based system and | This article describes a new feature of the EcoSpaceDebugger. The feature lets you easily import any tab-separated data into any eco-based system and enables you to define transformation on how to interpret the data and also look up values in to set links. | ||
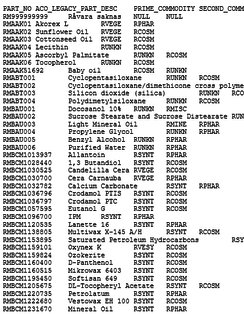
Suppose you find some data somewhere: | |||
[[File:Data Example.png|frameless|314x314px]] | [[File:Data Example.png|frameless|314x314px]] | ||
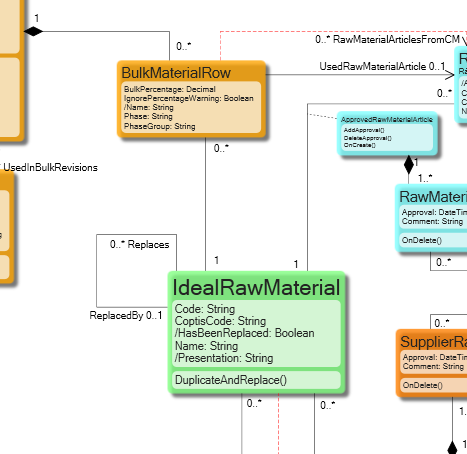
And you have model that should hold it: | And you have a model that should hold it: | ||
[[File:Model for data.png|frameless|467x467px]] | [[File:Model for data.png|frameless|467x467px]] | ||
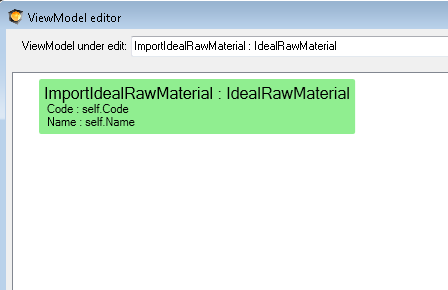
You can create a ViewModel that explains how to receive the data: | |||
[[File:View Model Data.png|frameless|448x448px]] | [[File:View Model Data.png|frameless|448x448px]] | ||
| Line 19: | Line 19: | ||
[[File:Import data system prototyper.png|frameless|442x442px]] | [[File:Import data system prototyper.png|frameless|442x442px]] | ||
Start the system and click | Start the system and click on the debugger: | ||
[[File:Import data start system.png|frameless|494x494px]] | [[File:Import data start system.png|frameless|494x494px]] | ||
Switch to the “Import tab separated” tab, enter the ViewModel | Switch to the “Import tab separated” tab, enter the ViewModel you want to control the import, and press “Get headers from viewModel” to the names in columns – in this case, Code and Name: | ||
[[File:Import data ecospace prototyper.png|frameless|696x696px]] | [[File:Import data ecospace prototyper.png|frameless|696x696px]] | ||
| Line 33: | Line 33: | ||
Now you have created objects – switch to the “'''Dirty Objects'''” to save them… | Now you have created objects – switch to the “'''Dirty Objects'''” to save them… | ||
== The “UseKey” | == The “UseKey” Flag == | ||
The UseKey instructs the logic to pick the first column | The UseKey instructs the logic to pick the first column. Try to look up this value with <ClassFromViewModel>.allinstances->select(keyname=’valueinfirstcolumn’). If an object is returned, it will be used for an update – if none is returned, a new one will be created. This will give one such evaluation per imported row. | ||
I have found this | I have found this to be a very versatile tool. One thing, though, that limited the usefulness of the tool is how keys(first column) are looked up in existing data. Before, all you had was “UseKey” and then “Key” which should be an attribute in the model. Here we have extended the ability to enter your own criteria: | ||
[[File:Import data mdriven debugger-lookups.png|frameless|696x696px]] | [[File:Import data mdriven debugger-lookups.png|frameless|696x696px]] | ||
This way I can, for example have an optionalfilter like this “->select(lp|(lp.ArticlePricePeriod.Name=’2014′) and (lp.SalesArticle.Article.ArticleNumber=vKeyValue))” and the imported values are steered to update just the objects I had in mind | This way I can, for example, have an optionalfilter like this “->select(lp|(lp.ArticlePricePeriod.Name=’2014′) and (lp.SalesArticle.Article.ArticleNumber=vKeyValue))” and the imported values are steered to update just the objects I had in mind. | ||
== Setting | == Setting Links == | ||
Often you will want to assign a link when importing your data. This is done by designing a ViewModel that has PickLists. This is powerful since the lookup will be made on the result of the expression of the Associated | Often, you will want to assign a link when importing your data. This is done by designing a ViewModel that has PickLists. This is powerful since the lookup will be made on the result of the expression of the Associated ViewModel Class. The lookup will be done in memory in dictionaries and will be very fast. | ||
[[File:Import data setting links.png|frameless|534x534px]] | [[File:Import data setting links.png|frameless|534x534px]] | ||
== Creating | == Creating Link Objects == | ||
Link objects can be created the same way. You will need to provide the two keys needed for the association in the first 2 columns. | Link objects can be created the same way. You will need to provide the two keys needed for the association in the first 2 columns. | ||
[[Category:Debugging]] | [[Category:Debugging]] | ||
{{Edited|July|12|2024}} | |||
Latest revision as of 15:35, 10 February 2024
This article describes a new feature of the EcoSpaceDebugger. The feature lets you easily import any tab-separated data into any eco-based system and enables you to define transformation on how to interpret the data and also look up values in to set links.
Suppose you find some data somewhere:
And you have a model that should hold it:
You can create a ViewModel that explains how to receive the data:
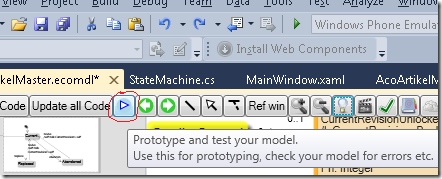
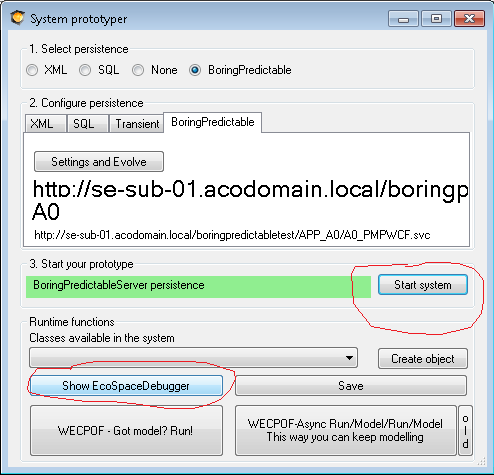
Now click up the system prototyper:
Start the system and click on the debugger:
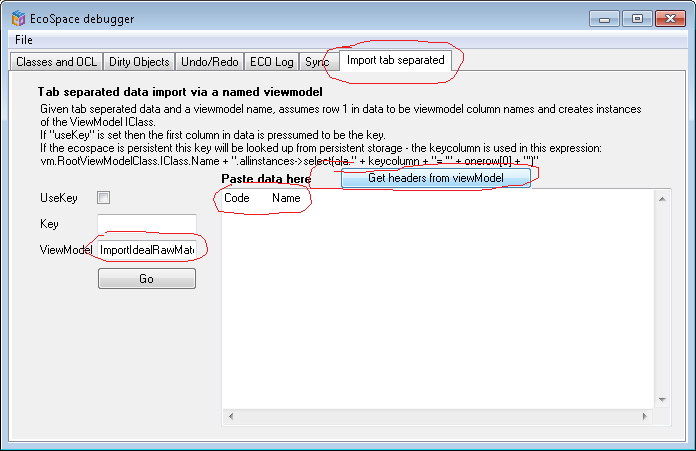
Switch to the “Import tab separated” tab, enter the ViewModel you want to control the import, and press “Get headers from viewModel” to the names in columns – in this case, Code and Name:
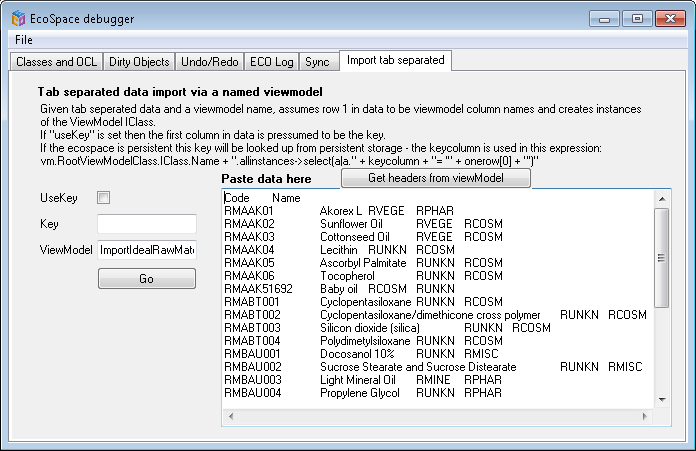
Paste in your tab separated data and press GO:
Now you have created objects – switch to the “Dirty Objects” to save them…
The “UseKey” Flag
The UseKey instructs the logic to pick the first column. Try to look up this value with <ClassFromViewModel>.allinstances->select(keyname=’valueinfirstcolumn’). If an object is returned, it will be used for an update – if none is returned, a new one will be created. This will give one such evaluation per imported row.
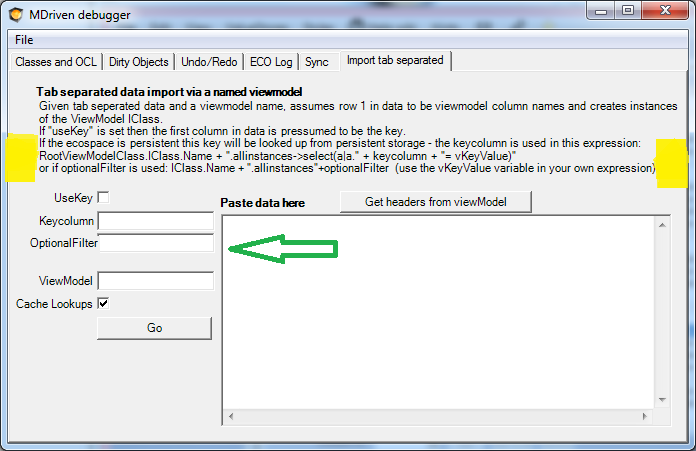
I have found this to be a very versatile tool. One thing, though, that limited the usefulness of the tool is how keys(first column) are looked up in existing data. Before, all you had was “UseKey” and then “Key” which should be an attribute in the model. Here we have extended the ability to enter your own criteria:
This way I can, for example, have an optionalfilter like this “->select(lp|(lp.ArticlePricePeriod.Name=’2014′) and (lp.SalesArticle.Article.ArticleNumber=vKeyValue))” and the imported values are steered to update just the objects I had in mind.
Setting Links
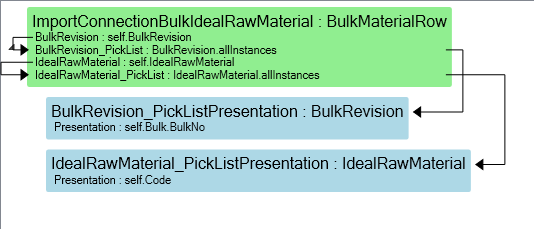
Often, you will want to assign a link when importing your data. This is done by designing a ViewModel that has PickLists. This is powerful since the lookup will be made on the result of the expression of the Associated ViewModel Class. The lookup will be done in memory in dictionaries and will be very fast.
Creating Link Objects
Link objects can be created the same way. You will need to provide the two keys needed for the association in the first 2 columns.

